Skip to content

Posts from the ‘Cape Breton’ Category

Maple Walnut Scones

35794303605_daedb07bcd_z (1)

People often ask me if I miss living in Canada. I’ve been living in Ireland now for almost five years. I have three great kids, a house we’re fixing up, a big garden (and more gardens planned), a small business and lots of friends and family milling around.

So yeah, it’s safe to say I’m usually too busy to be feeling homesick for Canada. That said, I recently got my kids their Canadian citizenship and, this year being Canada’s 150th birthday (if you’re First Nations, though, I should add that Canada is thousands of years older), I started feeling a bit nostalgic with all the celebrations and activities posted all over my social media streams.

Canada Day is July 1st, so it’s already happened. I didn’t do anything on the day to celebrate. Sometimes I host barbecues, bake a cake and have my friends over for Canada Day, but this year – having just had a baby – I wasn’t really feeling it. Too much, too soon.

But I can’t say Canada hasn’t been on my mind lately. So while I don’t miss living in Canada, there are a few things about Canada (or just Cape Breton, really) I miss in general:

13329181_510549772466139_228225748_n

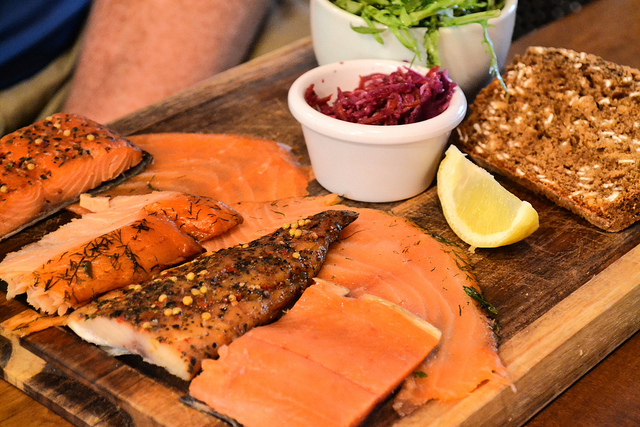
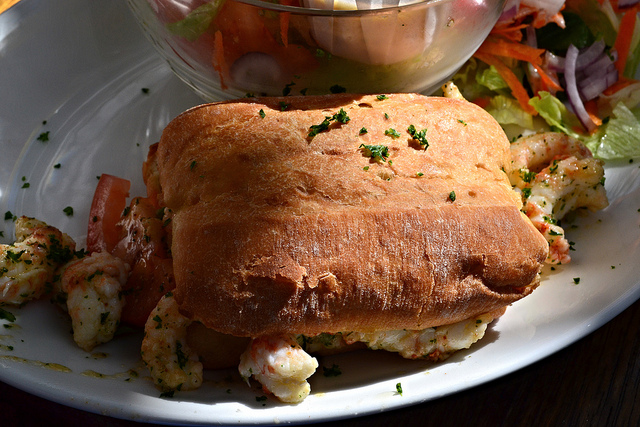
  1. Lobster season: May to July in Cape Breton. Lobsters everywhere you look. Lobster boil dinners at every small community hall. Lobsters being sold right from the boat. I love lobster, and I really miss eating it when it’s at its best. That also goes for mussels, scallops, haddock, salmon, chowder… and the list goes on. I know Ireland is surrounded by ocean, but there isn’t great seafood in landlocked Tipperary!
  2. The beach: Cape Breton has so many gorgeous beaches. By July the water is warm enough to swim, the sand is golden and fine-textured and the beaches are relatively isolated. I love Irish beaches, but find the water is usually a bit too cold and most beaches a bit too crowded.
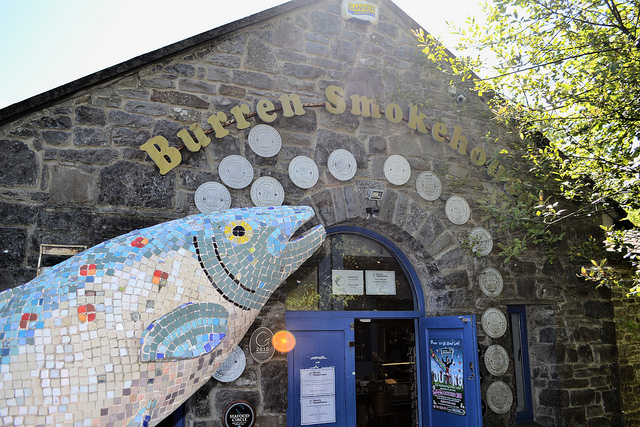
  3. The restaurants: I love lobster and seafood. I love the places that prepare these foods as well. The Rusty Anchor in Pleasant Bay (where I once had some decadent lobster poutine with a cold beer; one of my most favourite meals), The Dancing Goat in Margaree, The Herring Choker in Nyanza, Charlene’s Bayside in Whycocomagh, The Bite House in Big Baddeck – all of these places make amazing Cape Breton food and deserve all of the accolades. I miss these places.
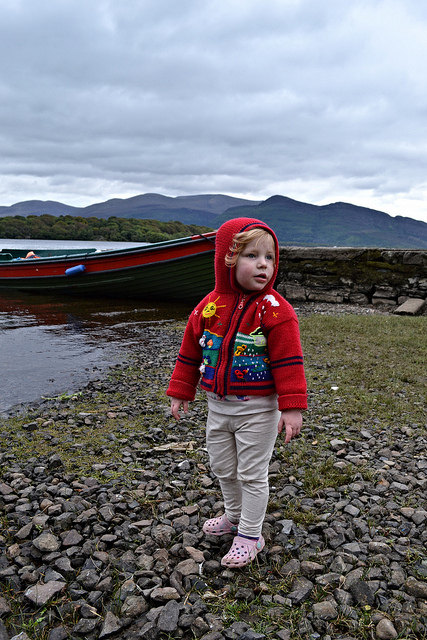
  4. My friends and family: Obvs. I love and miss my *very large* extended family. Aunties, uncles, cousins, nieces, nephew, brothers – I miss them all.
  5. The weather: in summer, it’s warm enough to swim in the river and in the ocean almost every day. On the East Coast, though, it’s not as hot as it would be elsewhere in Canada. We have the ocean to keep the temperature moderate (like, 35°C and under). A great deal warmer and sunnier than an Irish summer, but still comfortable (I don’t miss black flies and mosquitos, though).10631983_387625851388458_1137852623_n
  6. Wild Blueberries and good Maple Syrup: I miss these things very much. The fruit in Ireland is lovely, but the blueberries here don’t compare to the blueberries in Cape Breton.
  7. Canadian beer and wine: in Nova Scotia there is a wine appellation called Tidal Bay. It’s located close to where I went to university. The wine is gorgeous. Once, a sparkling wine called (Benjamin Bridge) Nova 7 beat out actual, expensive champagne at a tasting I attented in Toronto. It’s that good. The beer in Ireland is great, so I don’t miss Canadian beer that much; just certain kinds.
  8. Homestyle baking: I know I do a lot of Cape Breton-style baking here in Ireland, but I miss other people’s baking. Namely from the cafes I mentioned previously, my aunties and older people from around my community.

34953824254_710b08ea86_z

Speaking of homestyle baking, I especially love East Coast scones. Large, triangular, sweet with a crunchy sugar or glazed topping, scones in Cape Breton are indulgent – often made for sharing – and perfect with a cup of strong tea.

I whipped up these maple walnut scones with another nostalgic food in mind – ice cream! I love the ice cream at home. It’s not soft serve like a 99 here in Ireland, it’s hard and comes in a million and a half flavours; one of my favourites being maple walnut.

34953816084_a6b874af9b_z

No need for butter and jam on these scones. The glaze is thick enough to ensure the right amount of sweetness in each bite, and the walnuts are toasted in the oven and then soaked in maple syrup. Perhaps most importantly, the flavour is nostalgic enough to get me through to my next visit home.

35753392656_53fe6a4038_z (1)

Maple Walnut Scones

Ingredients:

2 1/2 cups/375g Plain Flour

1 Tbsp baking powder

1 tsp sea salt

1/4 cup/60g light brown sugar

1/2 cup/125g cold butter, cubed

1 large egg

2 tsp vanilla extract

1 cup/250ml cold buttermilk

For the glaze:

2 cups/500g Icing Sugar

1 tsp vanilla or maple extract

3 Tbsp good quality maple syrup

Splash of heavy cream

Toasted walnuts, soaked in maple syrup

Directions:

  • Preheat your oven to 200°C (400°F). Line one or two baking sheets with parchment and set aside.
  • In a large bowl, combine the flour, baking powder, salt, brown sugar and cold, cubed butter.
  • Using a pastry cutter or your fingers, cut/rub the butter into the dry ingredients until the mixture resembles coarse crumbs. Make a well in the centre of the butter/dry ingredient mixture.
  • In a large measuring cup, measure out the buttermilk, then add the egg and vanilla. Mix to combine.
  • Add the wet ingredients to the well in the middle of the dry ingredients. Using a wooden spoon or just using your hands (your best pastry tool!) mix the wet into the dry until just combined (mixture should be on the wet side – if it’s dry and crumbly add more buttermilk!).
  • On a lightly floured surface, turn the dough out and knead lightly for one minute. Form into a ball and allow to rest for 10 minutes.
  • Using more flour for dusting and a rolling pin, roll the dough out into a thick rectangle (you want to get 8-10 scones out of this dough at most). At least 1.5 inches thick.
  • Cut the rectangle into 8-10 smaller rectangles or triangles. Transfer to the prepared baking sheets. Using a pastry brush, lightly brush the tops with milk and sprinkle a bit of sugar over each scone.
  • Bake the scones for 20-ish minutes. Let cool slightly on a rack.
  • Make the glaze: in a mixing bowl, combine the icing sugar, maple syrup, maple extract (or vanilla) and about a tablespoon of heavy cream. You want the glaze to be thick, but still be able to drizzle it over the scones. If the glaze is too thick for your liking, loosen it up with a bit more cream.
  • Dunk the tops of each scone in the glaze, or spoon the glaze over each scone allowing the excess to drip down the sides. Top with toasted maple walnuts. Allow glaze to set slightly before eating (if you can wait that long).
  • The scones will keep no longer than two days, so make sure you eat them right away!

34953809364_d13def91f7_z


Fluffy Buttermilk Biscuits

34280978185_72bc56b632_z

Things are slowing down around here, and just in time, too.

  • The calves are pretty much all born. The eldest are already weaned!
  • The cows are out in the field, loving life (if you’re a cow and you have a choice between luscious, green grass or silage, you choose the grass every time).
  • The weather is brighter. It was chilly this past week, but for the most part Ireland has thawed out from the bitter winter. My garden is growing, we just got our house power-washed (a preemptive move as the house is getting a lovely new coat of paint very soon) and landscaping plans are in motion. We’re hoping for a warm summer with lots of BBQ’s!
  • I’m slowing things down with my small business, The Siúcra Shack. Spending more time with my kids, getting the house cleaned and organized and baking for fun. Just for now!

34240602386_9bd7fba75e_z

This is all because I am totally ready to pop. 38 weeks of pregnancy have flown by, and while I’m thankful for a complication-free pregnancy (and hoping for a complication-free delivery), I am so very ready to not be pregnant anymore.

I’m not being insensitive. I love my babies. I know we’re #soblessed. But three babies in less than four years is a lot for anyone to handle (except for all those women with more kids than me, or moms of multiples, or moms of multiples with other small kids – I’m in awe of those ladies). So, while we are very, very happy, I am also looking forward to a cold beer, getting my body back (in some form), and never being pregnant ever again once we welcome #3 in a few short weeks.

34280973155_ff06b58021_z

Did someone say biscuits?

So no cold beer for me just yet, but I have been milking these last weeks of pregnancy for all they’re worth. Entire tubs of ice cream? Yes. Massive bowls of creamy pasta? Absolutely.

An entire pan of these flaky, fluffy buttermilk biscuits?

Um… well… Patrick, Ciara and my father-in-law helped devour these, but I’m pretty sure I ate most of them.

34150232551_787ac676b5_z

They were just so good, you see. Especially with a generous schmear of Tipperary butter and a large dollop of strawberry jam. While still warm.

Actually, I made another pan this morning. I forced myself to give half away, but if Patrick is late coming back from work I can’t promise the remaining biscuits will still be here for his tea.

Since I’ve revisited the way I actually make biscuits, I thought I would share this recipe today. I’ve been making biscuits for a long time. I mean… I have no idea what age I was when I made my first pan of biscuits. I’m from Cape Breton. We literally eat these every day. I never thought I could improve on the recipe I already had in my head, but this “stand mixer/fold” method is getting a lot of online traction so I thought I’d give it a try.

34150303081_f6344942eb_z

Fold that dough in half!

I can tell you, I won’t be going back to rubbing in the butter with my fingers and rolling out once with a rolling pin. You get better flakes, height, texture and an overall fluffier biscuit with this method!

*For the Irish reading (and anyone else who wouldn’t consider this a biscuit), this is more of a scone for you, I know. BUT it’s not as sweet. You can eat these biscuits with savoury or sweet accompaniments. I like biscuits with fish chowder, casseroles. made into breakfast sandwiches and with baked beans as well as with the traditional jam/butter combo!

33471036433_03bb44fa69_z

Fluffy Buttermilk Biscuits

Ingredients:

4 cups/500g (weight) plain flour

2 Tbsp baking powder

1 tsp sea salt

1/4 cup/60g sugar

1/2 cup/110g cold, cubed butter

1 1/2 cups/400ml cold buttermilk

Directions: 

  • Preheat your oven to 200∘C (400∘F) and line a large baking pan with parchment. Set aside.
  • In your stand mixer, add all dry ingredients and, using the paddle attachment, mix to incorporate.
  • Add the cold, cubed butter to the dry ingredients and, continuing to use the paddle attachment, mix on med-low for 5-8 minutes, until the butter is mostly incorporated into the dry mixture (some chunks of butter are ok, but most of it should be mixed into the flour).
  • Add the buttermilk and mix just until everything comes together.
  • On a lightly floured surface, dump the dough out of the mixing bowl. Using your hands and a pastry cutter, start to shape the dough. Fold it in half, flatten out, then fold again and flatten out.
  • Cut out the biscuits and place them on the baking sheet. You can shape/fold the remaining dough and do a second cut, but I would discard the leftover dough after the second cut.
  • Bake 15-20 minutes, or until the tops and bottoms are browned and the bicsuits have risen.
  • Eat the same day, if possible. Even better, eat them hot out of the oven. With tea. And butter and jam.
  • Makes about 14 medium sized biscuits.

33439148704_52442c890d_z

Nova Scotian Rum Pie

32125386464_485dd8b511_z

I’ve worked under and with a lot of great chefs over the years. I’ve had mentors who were patient and generous with their knowledge and experience.

In Toronto I only ever worked for one restaurant company. I never felt the need to go elsewhere – I was treated well, paid relatively well (what cook is ever paid really well?), and enjoyed insurance and benefits most cooks never get. The best part, though, was the variety of my work and the amazing people I got to hang out with and learn from every day.

I wrote the above paragraph because it needed to be said. A cook is only ever as good as their mentor; I was really lucky to have several great chefs to learn from.

So why do I keep going back to my Grandma as my main culinary inspiration? It seems as I get older and have my own kids, I gain more and more respect for that sweet woman and what she accomplished in her life.

32969044525_824bb38691_z

On the outside it doesn’t look like she did much. She married my Grandfather at a young age, had seven kids and kept house. But I know the difference. Now that I have kids (and try to keep house) I understand the difficulties she probably encountered…

Except:

  • I don’t have seven kids. I have two.
  • I’ve never HAD to kill a chicken or grow my food. Those things are optional for me.
  • I’m financially better off than she was.
  • I don’t have a crippling autoimmune disease like she did.

I mean, I’m barely keeping it together as it is. The more I think about my Grandma, the more humbled I feel.

Especially considering the amount of time and money I put into becoming a chef. She was an amazing cook and baker. There may not have been much food in the house, but my Grandma kept all her kids fed and happy. She could take a bit of flour and sugar and turn it into something satisfyingly good.

I was watching The Chef’s Table last night on Netflix and was so inspired by the Korean Buddhist monk Jeong Kwan. Her food looks mouth-wateringly delicious, but, as it was stated in the documentary, as a cook she is completely without ego (which is so rare in our food network/social media-driven society). She lives her life simply, grows what she eats and shares what she has. Her food just happens to look like it was cooked and plated in a Michelin Star restaurant.

It reminded me of the way my Grandma would cook (though my Protestant Grandma would probably raise her eyebrows at being compared to a Buddhist; gotta stay honest). She never tried to do anything fancy, but her food always hit the spot, and she put love into everything she made.

32928584676_3265587ca3_z

Before I moved to Ireland, my Aunt gifted me a cookbook of old pioneer recipes my Grandma had given to her years before. I look through it often, but not just because of the recipes – the history of my island is written in between the pages. It starts from the oldest Scottish pioneer recipes (think Dandelion Wine and Athol Brose), has a portion of recipes from New Zealand, where a lot of our descendants also ended up and ends with the kind of soul-satisfying desserts, soups and casseroles I grew up eating.

This pie kept jumping out at me. Maybe, at almost 30 weeks pregnant, I’m just really missing booze; who knows? This rum-tinged custard creation satisfies so many cravings on so many levels, and (thankfully) the booze is for flavour and not cognitive impact, so it’s safe for anyone to pig out on.

The recipe may sound daunting if you’re not used to working with gelatin, but stick with it – it’s actually really easy. The amount of gelatin in this recipe will give the rum custard a wobble, but it won’t be 100% set like Jello. More like a slightly alcoholic, ice-cream flavoured panna cotta (and who could resist that?).

32928069836_7a59412a1c_z

Nova Scotian Rum Pie

Ingredients:

For the Crust:

1 package digestive biscuits (about 500g), crushed (in Canada, we use graham cracker crumbs)

125g/1/2 cup melted butter

For the Filling:

1 Tbsp un-flavoured powdered gelatin

125ml/1/2 cup cold water

375ml/1 1/2 cups whole milk

2 tsp vanilla extract, divided

170g/3/4 cup granulated sugar

Pinch of sea salt

2 eggs, separated (room temperature is best)

4 Tbsp spiced rum

For the Topping:

250ml/1 cup heavy whipping cream

3 Tbsp icing (confectioner’s) sugar

Shaved milk chocolate (OR here in Ireland I used crushed Flake bars), to garnish

Directions:

  • Preheat your oven to 180∘C (350∘F). Combine the crushed biscuits and melted butter. Firmly press the mixture onto the bottom and up the sides of a springform pan (or any high-sided pan with a removable bottom).
  • Bake the crust for 8-10 minutes, until browned. Set aside to cool.
  • In a bowl, add the cold water and sprinkle the gelatin over the top. Do not stir. Set aside and allow the gelatin to bloom.
  • Using a hand/stand mixer, whisk the egg yolks, sugar, salt and 1 tsp of vanilla until well combined (pale yellow, sugar dissolved). Add the milk and continue mixing until everything is well-combined.
  • Pour the milk/egg mixture into a saucepan and slowly bring to a simmer, stirring constantly. When the mixture thickens enough to coat the back of a spoon, pour it through a sieve directly onto the dissolved, bloomed gelatin/water mixture. Whisk to combine.
  • Allow this mixture to cool in the fridge until it begins to set, about an hour (possibly longer). Whisk the egg whites until soft peaks form. Add the rum to the custard/gelatin mix and then gently fold in the egg whites.
  • Pour this mixture onto the biscuit base and refrigerate overnight or until set. Whip the cream with the remaining tsp of vanilla and the icing sugar. Top the set custard with the cream and shaved chocolate.
  • Serves 8-10 rum-loving people (like Nova Scotians! We love our rum). Store in the fridge and eat within two days.

Upside-Down Strawberry Rhubarb Cake

28012873063_75522797c6_z

I’m back home. In Ireland, I mean. It’s funny, I call Cape Breton “home” and Ireland “home”, but when I talk about Cape Breton being home it’s meant to be past tense. As in, it used to be home and will always and forever more be referred to as home. But, as wonderful as Cape Breton was, and Vancouver, and Victoria, it is so, so good to be back in Tipperary.

In my own house.

With my little family.

28012811123_b5627f503c_z

Babies at pasture here in Tipperary

And it’s summer. My garden is growing. There are baby animals everywhere (and thanks to my cat, baby animal corpses everywhere, but we won’t go there right now) and, even though it’s often grey and rainy, it’s sometimes warm and sunny. Already much better than last summer, which was mostly cold, windy and rainy.

I’ve been home a little less than a month and I’m already super busy. Making plans, going to playdates, taking little day trips here and there, visiting, baking. The bit I’m most excited about is the plan-making, but I’m not ready to say anything more about it at the moment – just stay tuned!

27610294575_bcaff6d87e_z

Home in Cape Breton

Also, once again, this little blog has been long-listed for two Littlewood’s Ireland Blog Awards, which is really, really lovely! I’m also up for a Huawei Snapy Instagram Award! If you feel so inclined, you can check out my entry (and possibly give it a vote) here.

Littlewoods Blog Awards 2016_Judging Round Button_Longlist

So yes; I’m super busy. But don’t worry, I always have my two darling children to keep my ego in check. Whether it’s by peeing on the floor (daily) or simply staying up all night long, my kids continually remind me who’s truly in charge of my life (or I guess you could say: what’s truly important in life). I wouldn’t have it any other way, really.

When I came home, my garden was so overgrown with weeds it looked more like a jungle. It took four solid evenings of weed-pulling and seed planting, but my hard work is paying off. Napa Cabbage (for autumn kimchi making!), sprouting broccoli, cauliflower, squash, pumpkin, courgette – you name it, it’s been planted and is currently sprouting. I was late getting a few things planted, but the growing season is longer here than it is in Canada so I’m keeping my fingers crossed for a good harvest.

28011950914_f955ba2814_z

Two things that were ready when I got home were our strawberries and rhubarb. I’ve never grown strawberries before, but this year Maeve asked if she could plant them. Our old farmhouse is surrounded by very old, black cauldrons (I think they were used for laundry or something back in the day) so we found the biggest one and planted the strawberries there. We left tiny seedlings and came home to a huge, vine-laden bunch of plants just dripping with beautiful berries.

This is a great summer cake to make with whatever fresh fruit or berries you have on hand. I made it with our gorgeous strawberries (of course) and fresh rhubarb, but it would be great with blueberries (with some maple syrup and lemon), peaches, plums or cherries. The cake base is a super-moist hot milk cake recipe that I use all the time – it never, ever fails me.

28596388186_098cac1cea_z

Strawberry Rhubarb Upside-Down Cake

Ingredients:

For the cake:

1 cup/250g granulated sugar

2 large eggs

1 tsp vanilla

1 cup/250g AP/plain flour

1 tsp baking powder

1/2 tsp salt

1/2 cup/125ml scalded milk

3 Tbsp butter (melted into the hot milk)

For the topping:

1 punnet strawberries – hulled and cut in half

3-4 stalks rhubarb, chopped

1/2 cup/125g brown sugar

1/4 cup/60g butter

Directions:

  • Preheat the oven to 350∘F (190∘C, no fan). Grease a round springform pan and place the pan on a lined cookie sheet (in case it leaks) set aside.
  • In a small saucepan, combine the butter and brown sugar for the topping. Bring to a boil and remove from heat.Pour the mixture into the bottom of the pan and arrange the strawberries and rhubarb over the top. Set the pan aside again and make the cake batter.
  • To make the cake: whisk the eggs, vanilla and sugar until pale yellow in colour and nearly doubled in volume (this is known as the ribbon stage – the mixture should drip off the whisk in ribbons).
  • Add the flour, baking powder and salt to the mixture and stir until just combined. Add the hot milk all at once and, again, stir until just combined and there aren’t any lumps in the batter.
  • Gently pour the cake batter over the strawberries and rhubarb in the springform pan.
  • Bake in the preheated oven for 30-35 minutes (if you have an extra-hot oven start checking your cake at 25 minutes). A skewer inserted in the centre of the cake should come out clean.
  • When the cake is ready, allow to set in the pan for 15-20 minutes, then run a knife around the edges and gently remove from the pan. Flip the cake onto a plate and gently lift the bottom of the springform pan. Voila! You should have a perfect upside-down cake.

28550315151_c929b0d27c_z (1)

Seared Digby Scallops & Citrus Roasted Fiddleheads


27338109675_b484d204f1_z

I’m past the halfway point of my time home in Cape Breton, and on this chilly, rainy morning I’m feeling particularly sleep deprived, cranky and sore.

Sleep deprived because my five month old suddenly doesn’t sleep anymore. Or nap. Cranky because she looks at me, all red-eyed and wild-haired, and giggles. Like she’s being funny. She is not being funny. Sore because I started the Couch to 5k app three weeks ago, solidly finished three days of the app and then became completely lame. My knee gave out – a combination, I think, of wearing my mother’s running shoes (I left mine in Ireland) and having a wonky hip to begin with.

So basically, I’ve been hobbling around like a zombie the past few weeks with a clingy baby attached to my boob.

27338071365_9a20163992_z

I’m so torn between missing Ireland – my husband, my house, my friends, my life – and being happy in the place where I grew up. I get sad seeing my garden growing at home in Ireland, but at the same time I’m so happy having my children spend time with their Canadian family. I’m missing the great weather right now in Ireland because I know we could have spent some wonderful time together this past long weekend, my husband and kids and I, but I’m thrilled my daughter gets to splash around at the beach and take walks by the river and have campfires with her cousins – such Canadian rites of passage.

Over the years, it pains me to say, Cape Breton has become less home and Tipperary has become more home. Moving there is one of the best things I’ve ever done.

That said, Tipperary has crap seafood. Get with the program, guys.

I have been literally stuffing my face since I returned home. All of my favourites – Tom’s Pizza (those garlic fingers!), the epic sandwiches at The Herring Choker and The Dancing Goat, and way more to come (like The Bite House! And Charlene’s Bayside!). It’s been the seafood though – the sweet mussels, fried haddock, chunky chowders and fresh-caught lobster – that has me waxing all nostalgic these days.

The other night, we had Digby scallops (Digby is a lovely town on the mainland) with an East Coast specialty – fiddleheads! Fiddleheads, for those not in the know, are a type of fern that has not yet unfurled. So, it’s all curled up and vibrantly green, and looks like the end of a fiddle. Hence the name.

27304888346_2ee01b90ab_z

Fiddleheads are all kinds of delicious. Possibly toxic if you’re foraging and don’t know what you’re doing, but a delightful treat for those in the know. We’re in the thick of fiddlehead season, and you can even find them at the grocery stores right now (I have two small children and no time to forage, ok?).

Whether store-bought or foraged, you’ll want to make sure they’re thoroughly washed before you cook them. Soak them in water and vinegar as soon as you get them (if you forage, leave as much stem as possible). Rinse them, running your finger through the curled bit, no less than three times.

Safety folk will tell you to cook fiddleheads more than once. I don’t know how necessary that is if you’ve cleaned them well, but it never hurts to blanch them in boiling, salted water before finishing off in a hot pan or oven for a few minutes if you’re feeling nervous. This sounds like so much work, but they really are tasty little morsels and you can do so much with them once they’re cleaned.

Soup, risotto, roasted, stir-fried – my general rule of thumb is to treat the fiddlehead like asparagus. I love having them with poached egg and hollandaise. They’re great with seafood, which is why we had them with scallops the other night. A quick beurre blanc and we had ourselves about as fancy a dinner as you can find in Cape Breton.

27304839196_4fb019c85e_z

Seared Digby Scallops & Citrus Roasted Fiddleheads

12 large scallops, patted dry with a bit of paper towel

1 large bunch of fresh fiddleheads (about 600g), cleaned

1/2 lemon, juiced

salt and pepper

1 Tbsp cold butter, cut into small pieces

2 Tbsp olive oil

For the beurre blanc:

60ml/1/4 cup dry white wine

60m/14 cup white wine vinegar

250g/1 cup cold butter, cut into cubes

1 shallot, finely chopped

salt, to taste

Directions:

  • Once your fiddleheads have been thoroughly cleaned, trim the ends and place in a pot of boiling, salted water for 3 minutes. Immediately shock the fiddleheads in ice water to stop the cooking process. Strain and lay out on a baking tray lined with parchment paper.
  • Drizzle the fiddleheads with salt, pepper, lemon juice and olive oil. Preheat the oven to 400∘F (200∘C) and set the tray aside.
  • Make the beurre blanc: in a clean saucepan, add the shallot, vinegar and wine and boil on high until the liquid is reduced by half. Strain out the shallot and return the liquid to a medium heat. Whisking constantly, add the cubed butter a little bit at a time until it’s all incorporated. You should have a slightly thick, glossy sauce. Season with salt and keep warm, stirring occasionally until you’re ready to use.
  • Place the seasoned fiddleheads in the preheated oven. Roast for 5-8 minutes.
  • Make the scallops: heat a cast iron or stainless steel pan on high. Pat the scallops dry with paper towel, then liberally season with salt and pepper. When the pan is smoking hot, add some olive oil and sear the scallops on one side for 40 seconds (the shouldn’t stick – if they are sticking, they aren’t ready to turn so just wait a few seconds and try again). Turn the scallops and add the little cubes of butter to the pan. Baste the scallops with the browned butter as the other side cooks for about 30 more seconds.
  • Remove the fiddleheads from the oven, transfer the scallops to a warm plate and serve with the hot beurre blanc.

27304807626_e3d48ed31a_z

Maple Planked Salmon with Maple Dijon Glaze


27032853742_f13ce964df_z

In a culinary world full of deconstructions, elaborate plating, shocking flavour combinations and specially-foraged ingredients we sometimes lose sight of the simple pleasures of eating. A set table, friends and family, a smoking barbecue – great food done simply.

Maple syrup and salmon may not sound like a winning flavour combination to some, but it is a pairing that has withstood the test of time and always, ALWAYS impresses even the pickiest eater – especially if you’re cooking the salmon on a plank.

26523686063_b869030485_z

Planking salmon is one of my favourite ways to cook the fish. You can buy maple or cedar planks in most grocery stores in Canada, or if you have access to a lumber yard you could have someone cut you some. Cooking the salmon on a plank adds a distinctive flavour and light smokiness, but since you’re cooking the fish indirectly it also remains moist and flaky. Topped with a great glaze, a well-planked filet of salmon is tough to beat on a beautiful summery evening.

And we have been having some lovely evenings lately. 

I was disappointed with the weather when we first arrived in Canada – mostly due to the gorgeous weather that exploded in Ireland as soon as we left! Even though I spent the majority of my life in Cape Breton, I couldn’t believe the leaves weren’t out on the trees (as they were in Ireland) and the daffodils weren’t in bloom (they were long finished in Ireland) when we arrived in early May.

We’re still waiting for the leaves, but it won’t be long now. We’ve also caught some trout, gone on walks and played in the sunshine with family and friends in the two + weeks since we arrived. This salmon, which we enjoyed last night with a dear family friend, was icing on the cake.

26524509204_4393cc7f57_z

So you want to try planking your own salmon? Here’s the method I follow every time I plank (that sentence sounds so healthy, doesn’t it? If only.):

  1. SOAK – you need to soak your planks for at least 1.5 hours before cooking with them.
  2. TRIM – I buy an entire side of local salmon from the fish guy (who comes to the nearby village of Baddeck on Wednesdays to sell seafood out of his trailer).
  3. CURE – I lightly cure the salmon for 30-45 minutes before cooking. Just sprinkle the trimmed side of salmon with even layers of salt and sugar (I don’t measure, but a few tablespoons of each should be enough). Leave it for 30-45 minutes and you’ll see how much excess water is drawn from the fish. It makes for a more succulent filet, but you don’t have to cure your salmon if you don’t want.
  4. PORTION – A full side of salmon should provide around six generous filets. I sliced the side in half, then portioned each half into three.
  5. RINSE – If you didn’t cure your salmon, don’t worry about this step. If you did, you’ll want to rinse the excess salt/sugar from the salmon with fresh, cold water.
  6. DRY – Pat each filet dry with some paper towel.
  7. PLANK – Transfer your salmon filets to the plank(s).
  8. GLAZE – Brush some of your chosen glaze on the uncooked fish.
  9. GRILL + GLAZE – The final step! Place the planked salmon on the barbecue grill (you can also do this in the oven – but it’s not as nice), close the lid and allow the salmon to cook slowly on medium for about 15-20 minutes (keep an eye – it will take a bit of time for the planks to heat the salmon, but it won’t be longer than 20 minutes). Intermittently, you can add more glaze as the heat and smoke does its work.

26523707273_62aee8c0da_z

26523709753_a23f8f4beb_z

This sounds like a lot of work, but like any great meal, if you’re prepared and organized it will come together so, so easily. Serve with wild rice or roasted potatoes and sauteed greens (some nice wine won’t go amiss, either).

Here’s the recipe for my favourite maple glaze:

26523623743_78f7126a6f_z

Maple Dijon Glaze for Planked Salmon

Ingredients:

1/3 cup/80ml good quality, medium or dark maple syrup

1/4 cup/60g Dijon mustard

1/2 Tbsp each: finely chopped fresh chives, parsley, dill, oregano

Salt and Pepper, to taste

Directions:

  • In a small bowl, mix the maple syrup, dijon and fresh herbs.
  • Season with salt and pepper.
  • Add some glaze to the uncooked salmon, then add more while the salmon cooks.

26853304240_842df7960b_z

Grammie’s Baked Chocolate Pudding

26881713572_e56cc368bd_z

I’ve been in Canada for a little over a week now. The jetlag is gone, the sun is shining (though the temperature is nothing like the balmy weather the Irish are enjoying) and I’m busy catching up with family and friends I haven’t seen since 2014. If my husband were here with me, things would be perfect. He’s not, though, so things are just very good.

26863482752_6e416b112a_z

We’ve been spending a lot of time outdoors since the sun’s been shining. There’s a large pond behind my parents’ house and Maeve likes going down there to see if there are any frogs (though she doesn’t like to get too close to the water for fear of falling in). We’ve been looking under big rocks and logs for bugs, wiggly worms and the many cute little salamanders who call the backyard their home.

26352293924_6e204bd371_z26863674042_297e4c5c33_z

Last weekend was Canadian Mother’s Day (we celebrate in March in Ireland) and as we spent the day spoiling all the moms and mom-types in our lives, I couldn’t help think about my sweet Grandma, who lived with me and my family until she passed away over 15 years ago.

Aside from my mother, who taught me that you can work full time, be a great mom, have a social life and be involved in your community, my Grandma was the most important woman in my life. She suffered from MS and was confined to a wheelchair, but that didn’t hold her back. She was a sweet, strong, soft-spoken woman.

26370673214_00d217e815_z

She was also a great baker.

This Baked Chocolate Pudding is one of my favourite “Grammie” desserts. Served hot with fresh cream or ice cream, it’s pure bliss. Velvety chocolate sauce with soft, rich cakey bits – what’s not to like? If you’re having people over for dinner, you can put it in the oven just before you’re ready to sit down to eat. It will be molten hot – the perfect vessel for something cold and creamy dolloped over top.

26975846545_a1eacd7cf5_z

*My plan was to lose as much baby weight as possible while home for the next 1.5 months. I realize now this probably isn’t going to happen. Stay tuned for more delicious Cape Breton adventures!

Grammie’s Baked Chocolate Pudding

Ingredients:

For the cake:

1 cup/250g plain flour

2 tsp baking powder

1/2 tsp salt

1/4 cup/60g good quality cocoa

1/2 cup/125g granulated sugar

1 tsp vanilla

1/2 cup/125ml buttermilk

1/4 cup/60ml strong coffee

2 Tbsp/30g melted butter

For the sauce:

3/4 cup/200g light brown sugar

1/4 cup/60g good quality cocoa

1 tsp vanilla

1/2 tsp sea salt

1 cup/250ml boiling water

1 cup hot strong coffee

Directions:

  • Preheat the oven to 350∘F (180∘C).
  • Sift all of the dry ingredients into a mixing bowl. Stir the hot coffee and melted butter together. Add the buttermilk/vanilla to the dry ingredients, then the coffee/butter mixture. Mix the batter until everything is *just* combined (don’t overmix). Pour the batter into an ungreased pie dish or small casserole dish and spread evenly on the pan.
  • Mix the hot coffee, boiling water and vanilla and set aside. Mix the cocoa and brown sugar and sprinkle evenly over the top of the batter. Pour the hot water/coffee mixture evenly over top.
  • Place the pie/casserole dish on a sheet pan (in case it overflows) and bake in the preheated oven for 45 minutes.
  • Allow to cool 10-15 minutes, then serve hot with ice cream or whipped cream.

26370636674_c700c00484_z

Making Our Wild Atlantic Way

Cliffs of Moher

Cliffs of Moher

So we recently took a road trip around Ireland. Let me set the scene for you all:

Four middle-aged Canadians, one young(ish) couple and a crazy two year old started off here at the farm in Tipperary. Early the prior day, we realized we were supposed to collect the last Canadian couple from the airport THAT MORNING and not the following morning as we had previously thought. We had less than two hours before they were due to land when we made the realization, and luckily we’re only 1.5 hours from Dublin airport (Tipp is just so darn central!), so it was a very unplanned but ultimately successful trip to the airport and back with said Canadians.

The next day, we loaded up into two cars and headed to Belfast (via Dublin airport to get a larger rental car for the Canadians). Belfast is about as far from Tipperary as Cape Breton is from Halifax (in Canada). That is to say, four hours. Luckily, the kid slept after Dublin airport (YOOK AT DEE AIYOPWANES MUMMY!) and awoke just as we were entering Belfast.

Maeve & Grandpa on the Belfast City Tour

Maeve & Grandpa on the Belfast City Tour

Maeve & Nana at The Crown Pub

Maeve & Nana at The Crown Pub

After lunch at the Crown Pub (when you’re visiting for the first time, you gotta!) the group split into two – one group did the city bus tour with the kid while the others visited the Titanic Museum. We were only staying one night, so tough decisions had to be made. We got to see a lot of Belfast in a very short amount of time and we had a beautiful day for it.

Carrickfergus, Co. Antrim

Carrickfergus, Co. Antrim

My Dad on the Carrick-a-Rede Rope Bridge

My Dad on the Carrick-a-Rede Rope Bridge

The next day we got up bright and early and did the Causeway Coastal Route to the Giant’s Causeway. This is one of Pat’s and my favourite drives in all of Ireland. I know it’s technically not the Wild Atlantic Way, but it’s beautiful – running through quaint seaside villages with both mountain scenery and stunning ocean views. Of course we took the Canadians to the Carrick-a-Rede Rope Bridge before reaching the causeway.

After a quick lunch stop in Portrush we made our way to Sligo.

Strandhill, Co. Sligo

Strandhill, Co. Sligo

Shell's Cafe, Strandhill

Shell’s Cafe, Strandhill

Yup. All. The. Way. To. Sligo. In one afternoon. You see, the Canadians only had ten days and this was the best way to cram everything in.

So we made it to Sligo and spent the night at the Clarion (great hotel – it’s in a really old building that I heard was possibly once an insane asylum!). After letting Maeve swim in the bathtub for awhile, we met Pat’s brother and his wife for dinner. The next day, we had brunch at Shell’s Cafe in Strandhill. It’s a quirky little seaside cafe that serves delicious food. Strandhill is just outside Sligo, on the coast.

After Strandhill we made our way to Lisdoonvarna, Clare. Yes, you read that right. All. The. Way. To. Clare.We were tapped for time! I don’t think my Dad has forgiven me for vetoing his idea to drive through Connemara on the way – it just would have taken way too long.

Burren Smokehouse

Burren Smokehouse

The fish platter at The Burren Smokehouse Pub

The fish platter at The Burren Smokehouse Pub

So we got to Lisdoonvarna (through The Burren! It was beautiful!) and the first thing I wanted to do was eat. We found the Burren Smokehouse, which is famous for it’s delicious smoked salmon. The smokehouse also runs a small pub down the way, so we went there for lunch. I had a hot-smoked baked salmon fillet with spinach, potato and mustard cream sauce. Just lovely. This is actually the best smoked salmon I have ever had (and I have a brother who smokes his own salmon – sorry Matt!).

Maeve and I found a playground (EHGROUND MUMMY? ME GO EHGROUND?) while the others blew a tire on their way to the Cliffs of Moher. At least it was a nice day. I hear it was the fastest tire change anyone had ever seen. They made it to the Cliffs and back, and we all piled back into the car and made our way to Listowel in County Kerry.

Yup.

All. The. Way. To. Listowel.

From Sligo.

I will probably never do a roadtrip like this with a toddler ever again. We went through a lot of chocolate to keep her happy. And the Frozen soundtrack on repeat.

Once we got to Listowel, though, it was smoother sailing. We stayed with Pat’s Auntie Bridget who has a beautiful farm house in the middle of the countryside. She fed us and gave us comfortable lodgings, and we all had a good night’s sleep.

Overlooking the Conor Pass, Co. Kerry

Overlooking the Conor Pass, Co. Kerry

The next day we went to Dingle. We went by the Conor Pass. I didn’t know what to expect, but I’ve heard enough folk snicker about it being a scary road so I was a teensy bit prepared (way more than the Canadians in the car behind us, anyway). When the road started getting higher into the mountains I thought, “Yeah, ok, I can handle this.”

Then the road got a bit smaller. By a bit, I mean from two lanes to one. With no guard rail. On the edge of a rocky cliff. WHAT HAPPENS WHEN YOU MEET SOMEONE COMING IN THE OPPOSITE DIRECTION?

Hot Langoustine Roll heaven

Hot Langoustine Roll heaven

Murphy's Ice Cream!

Murphy’s Ice Cream!

It was an amazing drive, though, and one I’ll take visitors on again. We made it to Dingle in one piece and had an awesome seafood lunch at Danno’s Pub (hot langoustine roll, anyone?) followed by a *very large* ice cream from Murphy’s (their Irish Sea Salt ice cream is one of the best things that’s ever happened to me, and I’m not exaggerating).

Innisfallen Island, Killarney, Co. Kerry

Innisfallen Island, Killarney, Co. Kerry

We relaxed back in Listowel and stayed another night, driving to Killarney the following morning for a little tour of the lakes. Our boat dude took us over to Innisfallen Island where we disembarked and wandered through the ruins of a 7th century monastery before surprising a large herd of deer – the island’s only current inhabitants. Maeve and I threw some stones in the lake before we headed back to Ross Castle and back to the car.

Deer on Innisfallen Island

Deer on Innisfallen Island

From there, we had some lunch and went home. Yup. Back. To. Tipperary.

I told you we were pressed for time!

Truthfully, we could have stayed longer. There’s so much to do and see. But Pat and I were really looking forward to our camping weekend at Electric Picnic, and we had to be home by Friday. The Canadians just left the other day, spending their remaining time in and around Tipperary and Kilkenny (because why wouldn’t you? Everyone loves Kilkenny.).

So, that was our trip, sorta kinda going around the Wild Atlantic Way. Do not attempt to do this kind of roadtrip with a toddler, that is my best piece of advice (or, at least, have a running list of playground locations for each pit-stop).

Best Ever Carrot Cake

15801614371_7e9482597a_z

I usually hate calling recipes “the best ever” or “perfect”, but in this case it’s true – this is, really, the only carrot cake recipe you’ll ever need. It’s uber-light, soft and not too sweet. It’s got layers of flavour without being too busy – no need for raisins or coconut or nuts. You can make it with things you already have in your pantry or fridge. In other words, it’s a very low-maintenance cake that tastes very high-maintenance.

I’ve been using this recipe for ages. I don’t think I have it written down anywhere. The reason I made it today is in honour of my beautiful niece and god-daughter, who lives in British Columbia, Canada (pretty much halfway around the world) and is turning ONE tomorrow.

15183602834_21836fb18c_z

I wish I would be there to give her a big birthday hug and hand her her birthday gift in person. I wish she and Maeve could spend the afternoon playing together and getting into mischief. But, unfortunately, my brothers and I have all chosen to live in very-far-apart places! In any case, we will have a mini-celebration here in Ireland and give her lots of hugs the next time we see her.

15618623918_fa4cf3600d_z

When we were all home in Cape Breton last August, I made this cake for my niece and nephew’s double christening. It went down a treat. Then, my sister-in-law asked for the recipe so she could make it for my niece’s birthday celebration. I actually had to think about it as, like I said, I don’t really have it written down anywhere. I gave her this recipe and then made it myself, just to make sure I got the measurements right. Now I’m sharing it with you, you lucky people.

This cake can be doubled and served as a big slab cake with traditional cream cheese frosting for a gathering or celebration, but’s its equally enjoyable in bundt form for a simple Sunday dessert. I topped mine with a whipped mascarpone and honey glaze before burning, not one, but TWO trays of walnuts. They were going to be crumbled over top.

15801496871_531060c984_z

The joys of country living mean I can’t just run to the shop for more walnuts, but I will tell you that the cake is lovely as is. I hope the cake my niece eats tonight is just as tasty (her mom is a pretty excellent cook, so I’m sure it will be).

15618919907_989a906ea0_z

Happy birthday, beautiful Charlotte!

Best Ever Carrot Cake

Ingredients:

3 eggs, room temperature

1 1/4 cups granulated sugar

1 tsp vanilla

1/2 cup vegetable oil

2 cups AP flour

1 tsp baking powder

1/2 tsp baking soda

1/2 tsp salt

1 tsp cinnamon

1 tsp mixed spice (nutmeg, allspice, cloves)

2 cups grated carrot

1 can crushed pineapple

For the Glaze:

1 cup mascarpone cheese

1 vanilla bean, split lengthwise & seeded

3-4 Tbsp good quality honey

splash of fresh cream or orange juice

Directions:

  • Preheat your oven to 350 degrees (180 degrees Celsius, no fan). Grease and flour a bundt or rectangular cake pan. Set aside.
  • In your stand mixer (whisk attachment) or with a hand mixer, whisk the eggs, sugar and vanilla together until pale in colour and doubled in volume.
  • While whisking, slowly drizzle in the vegetable oil to make a thick emulsion.
  • In a separate bowl, whisk together dry ingredients. Add all at once to wet and mix until just blended.
  • Fold in the carrot and crushed pineapple. Scrape batter into prepared pan.
  • Bake for 40-45 minutes, until a toothpick inserted in the centre comes out clean.
  • Cool 15 minutes in the pan, then carefully remove to cool completely on wire rack.
  • Make the glaze: in your stand mixer (paddle attachment) or with your hand mixer, beat the vanilla seeds and mascarpone cheese until light and fluffy. Drizzle in honey, continuing to mix.
  • Add the cream or orange juice. Mix until all is well combined. You want a thick but pour-able glaze.
  • When the cake is cooled, pour the glaze over top. Serve immediately or the next day – it gets better with age. Keep covered and chilled.

15184028703_b4b1245d22_z

Blackberry Cream Scones

15404478112_57b1733ec4_z

I love the autumn.

Not that it’s been very autumn-ey here in Tipperary. When I got off the plane in Dublin a month ago I was prepared with a warm sweater and my rain jacket handy, but as it turned out I didn’t need them… and I haven’t needed them all month.

This is strange to me.

15218267340_1530272b7a_z

See, the very first time I came to Ireland was in September. I left Korea with Pat and we were going to settle in Toronto for a few years, but we wanted to come here to visit with his family for awhile. So while my two cats flew straight to Toronto to be picked up and cared for by two saintly friends, Pat and I flew to Ireland for a month.

When we left Korea, it was normal Korea-weather for September. Hot. Still hot. Muggy. So muggy. I had been getting Japanese straightening perms my entire time in Asia but still, my hair was no match for a long Korean summer.

Imagine my genuine shock when we landed in Dublin late on that September evening, coming from the hot, sunny weather in Korea and descending into the bone-chillingly cold Irish autumn.

I got used to it quickly, and in fairness, it wasn’t bone-chillingly cold our entire time in Ireland (there was a particularly beautiful warm, sunny day spent on the lakes of Killarney). When we arrived in Toronto later that October I wasn’t so shocked by the cold weather.

15404814002_bab94d0204_z

With the unseasonable warmth this year came a shitload (an actual technical kitchen term, folks) of blackberries. I don’t know if I mentioned this already, but Pat and I are fixing up the family farmhouse in Tipperary, meaning we’re not in Waterford anymore (sniffle). We live down a long dirt road lined with hedges. I was delighted to discover the hedges were basically all blackberry bushes, sloe bushes, rosehips and elderberries. Jackpot.

15218555727_43dc39fe49_z

Taking Maeve for a daily walk down the lane to see the “moo’s”, I would fill the two cupholders on the buggy with big, juicy berries. When I’d acquired enough, I just had to make a batch of cream scones. Two reasons for this:

  1. I live on a dairy farm now. I can just skim a bit of cream from the batch whenever I want. ENDLESS CREAM, PEOPLE.
  2. I had an amazing meal in Cape Breton at The Bite House which ended with a gorgeously plated cream scone crumble. I couldn’t get Bryan’s scone out of my mind.

15381796566_b5b17ae784_z

Blackberries are my favourite berry after wild blueberries. I just love the flavour of them, especially picked wild and at their peak. It’s funny, each year I expect them to taste like raspberries (don’t ask me why) and am then pleasantly shocked when I remember how a blackberry is supposed to taste. They go so well with these sweet, crumbly scones and go particularly well with cream. You could skip this recipe altogether and just have a bowl of ’em with cream.

15218380477_c03d313649_z

Blackberry Cream Scones

Ingredients:

Scones:

4 cups cream flour

2/3 cup golden demerera sugar

2 Tbsp baking powder

1/2 tsp sea salt

2/3 cup cold, cubed butter

2 cups rinsed, fresh blackberries

1 tsp vanilla essence

1 1/2 cup fresh cream

1 egg

Glaze:

2 cups confectioner’s sugar

3-4 Tbsp cream

Splash of vanilla essence

Directions:

  • Preheat the oven to 425 degrees (210 degrees Celsius, no fan) and line one or two baking sheets with parchment. Set aside.
  • In a large bowl, mix the flour, sugar, baking powder and salt. Rub in the cold butter until the mixture resembles coarse crumbs.
  • Add the blackberries to the mixture. In a separate bowl, mix the cream, egg and vanilla. Make a well in the dry ingredients and add the wet all at once.
  • Mix until everything is just incorporated. On a well-floured surface, knead/continue to mix the dough until you have a bit of elasticity (the dough may be on the wet side).
  • Let the dough rest for 10 minutes.
  • Roll out the dough to a thickness of at least an inch. Cut and place each scone on the parchment lined baking sheets.
  • Bake for 15-20 minutes until the tops are golden brown.
  • Mix the three ingredients together for the glaze. Using a pastry brush, lightly glaze each scone while they’re still warm.

15381953436_63a2df8f32_z